

How To Turn Your Draft Into A Self-Published Novel: The 101
These are the steps I used to self-publish my first book, 1 Lovelock Drive

Self-publishing has revolutionized the world of books, giving authors the freedom to share their stories without relying on traditional publishing houses.
I’m a big fan, if you can’t tell.
As a self-published author, I’ve experienced this journey firsthand. In 2024, I published my debut novel, 1 Lovelock Drive.
This story started as a blog here on Substack and transformed into a fully-fledged book available to readers worldwide through Amazon Kindle Direct Publishing (KDP) and print-on-demand.
The process was equal parts challenging and rewarding, but I learned that with the right steps and tools, turning a manuscript into a published book is entirely within reach.
It’s a cliche, but if I can do it, you can do it.
Whether you're a first-time author or if you can’t stand the traditional publishing industry and you’re looking to take control of your publishing career, this guide will walk you through each step I took to self-publish my book on Amazon (and most of these steps will be transferable to other platforms, too).
By the end, you’ll have a clear roadmap to make your publishing dream a reality—no matter what genre or story you bring to life.
Let’s get started!
Quick Note
My journey has always been on Amazon, which afforded me the best print-on-demand options with royalties to match.
Later this year, I will begin printing and selling books through an e-commerce store I manage.
When this happens, the journey and process will be fully documented here. You will need to be subscribed to find out when this is happening! Don’t miss out! ⬇️
If there is anything you want me to cover in the journey, let me know in the comments at the bottom of this post!
Step 1: Finalize Your Manuscript
Before publishing your book, it’s essential to ensure your manuscript is in its best possible form - assuming you’ve written it, of course. (If you want to know how to write a manuscript/draft for self-publishing, we can get into that another time.)
This is the foundation of your work, and any errors or inconsistencies could hurt your book sales. It could also be what turns a really great story into a horrible read!
It’s a basic in this process but it would be silly of me to leave it out of the checklist. It’s not to be overlooked or underestimated.
Here's a detailed breakdown of how to polish your manuscript to perfection:
1.1 Edit and Proofread
Your manuscript needs to be polished and professional, which requires thorough editing and proofreading. Here’s how to tackle it:
Self-Editing
Start by reading through your manuscript multiple times - on the screen, print it off, read it out loud, read it on paper.
Focus on big-picture issues in the first pass: Does the story flow well? Are there plot holes or inconsistencies? Do characters feel real and well-developed?
Pay attention to sentence structure, grammar, and spelling in subsequent reads. Tools like Grammarly, ProWritingAid, or Hemingway Editor can help catch common mistakes and improve readability. Pay attention, but don’t focus on it until you’re at the final stage. There’s no point in editing and changing grammar for you to delete the content the next day.
Use professional editing programs to make your grammar and spelling changes. I recommend looking into (and paying up for because this is one of those times you need all the features!) the following: GRAMMARLY, PROWRITINGAID, HEMINGWAY APP, and AUTOCRIT.
By the way, these are not affiliate links. I have no financial incentive to rave about these programs. I’m just a fan!
Professional Editing
If your budget allows, hire a professional editor. It’s what I did (and I went onto Fiverr to find mine). There are three main types of editing:
Developmental Editing: This focuses on the overall structure, plot, pacing, and character development. This was a game-changer for me. After one session with my editor, I had so much to work with and tangible changes I could make.
Copyediting: Looks at grammar, syntax, word usage, and overall clarity.
Proofreading: The final polish to catch typos, formatting errors, and inconsistencies.
Editing Tip: Take breaks between revisions. Fresh eyes often catch errors you’ve overlooked. I used to take days between edits. I used to change my environment, so I wasn’t always reading it in the same space.


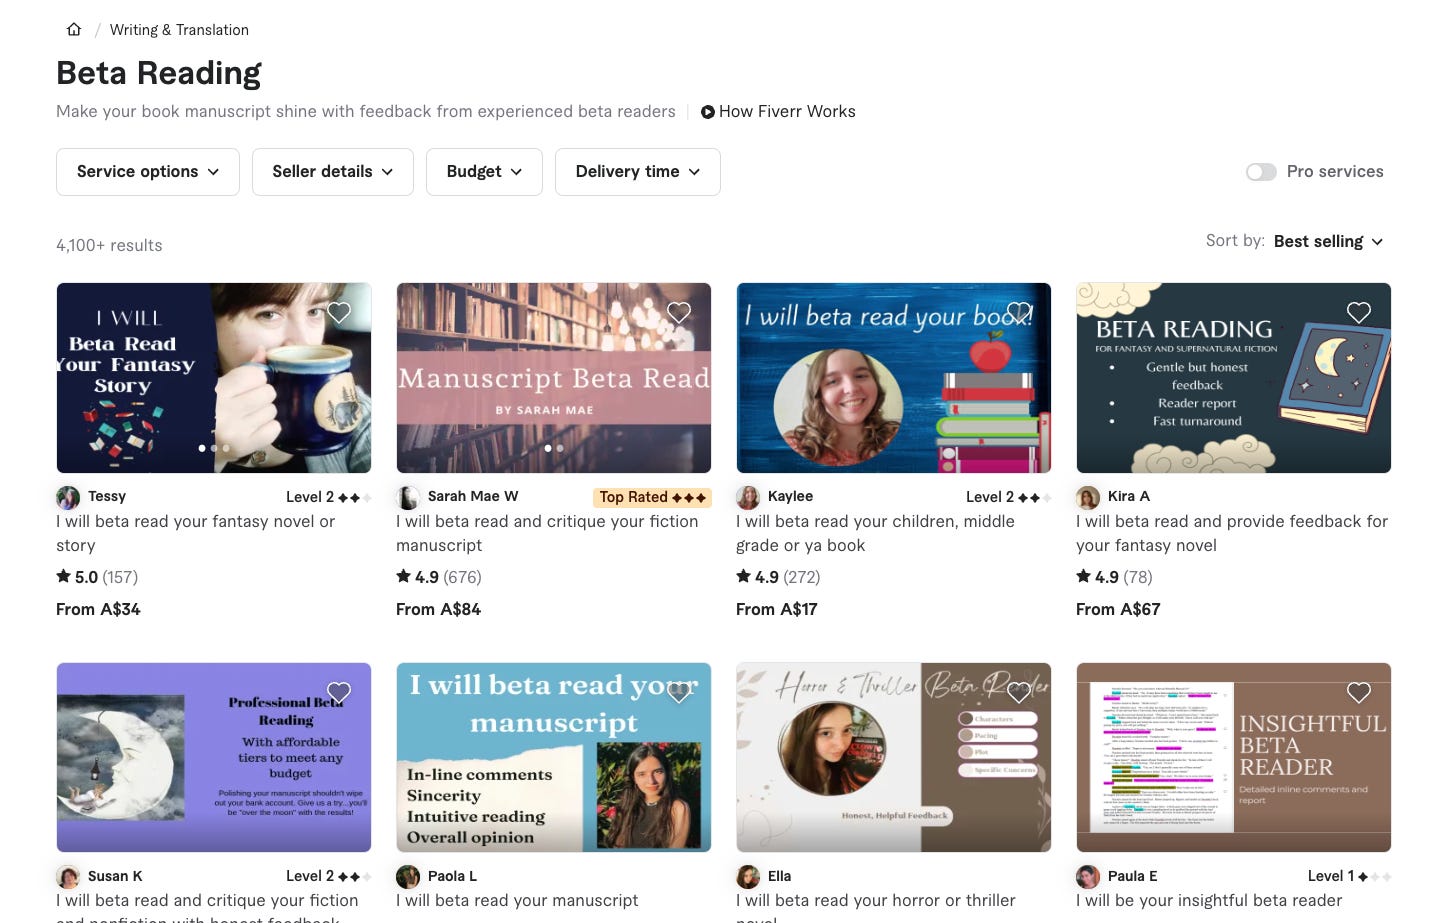
1.2 Use Beta Readers
Beta readers are invaluable for getting honest, unbiased feedback on your manuscript before it hits the market. They read your book and provide insights from a reader's perspective.
I didn’t use them because I wasn’t fully aware of them or if I had access to them when I was publishing. I thought it was a traditional publishing exclusive, but I’m thankful to say they’re available to all writers.
If I could go back in time, I would use Beta readers. Once again, you can turn to places like Fiverr to find Beta readers, as shown below. I’ve also Googled beta readers in my area and searched on TikTok for Beta Reading groups.
Choosing Beta Readers
Find people who enjoy your book’s genre - if you write romance, find romance Beta readers.
Avoid close friends or family who may not provide critical feedback. They could be too nice or too mean. If they aren’t readers, they don’t understand what you need to know.
Look for Beta readers on platforms like Goodreads, writing forums, or social media writing groups.
What to Ask for
Create a feedback form or provide guiding questions, such as (these are just examples, but they give you an idea):
Were the characters relatable?
Did the plot hold your interest?
Were there any confusing parts?
Would you buy the book?
Would you read a sequel?
Encourage honest and constructive criticism. This is not the time to have your ego stroked. This is about making your writing better.
Incorporate Feedback
Review all feedback and decide which suggestions align with your vision for the book.
Be open to changes, but stay true to your story.
1.3 Format Your Manuscript for Publishing
Once your manuscript is edited and polished, it’s time to prepare it for publishing. Proper formatting ensures your book looks professional and meets Amazon KDP’s guidelines.
Formatting for Kindle eBook
File Types: Amazon KDP accepts DOCX, EPUB, or KPF files for eBooks.
Page Layout: Use tools like Scrivener, Vellum (Mac), or Reedsy Book Editor to format your manuscript for Kindle. I used the Kindle Create App, which is completely free to use and download. Focus on:
Indented paragraphs (no tabs).
Consistent font size (11-12 pt) and type (Times New Roman, Arial, or Georgia).
Avoiding double spaces after periods.
Table of Contents: Amazon requires an interactive table of contents for eBooks.
Formatting for Paperback
Use a word processor like Microsoft Word or Google Docs for basic formatting.
Set your page size to match the trim size you’ll select on KDP (e.g., 6" x 9").
Set margins and ensure line spacing is readable (1.15–1.5).
Create distinct sections for the front matter (title page, copyright, dedication), the body (chapters), and the back matter (acknowledgments, author bio).
Save the file as a PDF for submission to KDP.
Formatting Tips
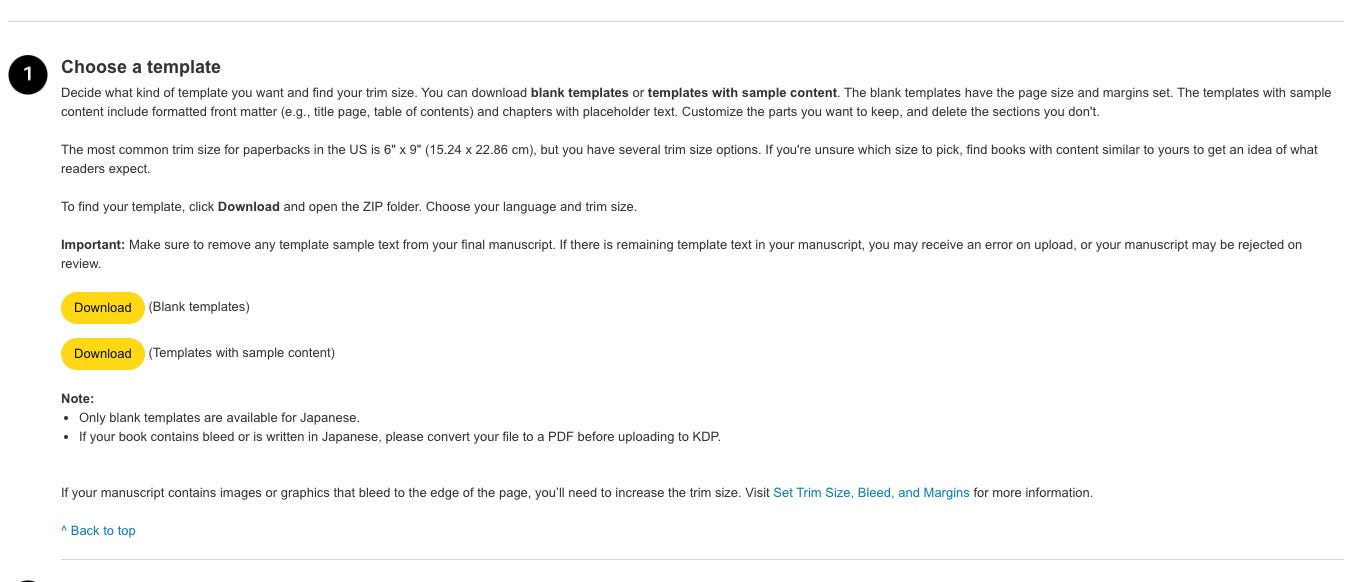
Amazon provides downloadable templates for both eBooks and print books, which include proper margins and formatting guidelines. This is what I used, which is on Amazon’s website:

Always test your manuscript in previewers (like Kindle Previewer) to ensure it looks professional on different devices.
1.4 Check Legal and Copyright Requirements
To finalise your manuscript, you’ll want to secure your legal rights.
Copyright Your Work
In most countries, your work is automatically copyrighted when it’s written. However, registering your copyright formally through a government body (e.g., the U.S. Copyright Office) offers additional legal protection.
Dedication and Permissions
If you include quotes, song lyrics, or material from other works, ensure you have permission to use them.
ISBN (International Standard Book Number)
Amazon KDP provides free ISBNs for paperback books, but you can also purchase your own through agencies. Again, just google ISBN providers in your country.
Checklist for Step 1: Finalizing Your Manuscript
Manuscript edited and proofread.
Feedback incorporated from beta readers.
Manuscript formatted for Kindle eBook and/or paperback.
Copyright and permissions secured.
Ready-to-upload file saved in the correct format (e.g., DOCX, EPUB, or PDF).
With a polished and professional manuscript in hand, you’re ready to move on to the next step: designing an eye-catching cover!
Step 2: Design Your Book Cover
Your book cover is the first thing potential readers will see, so it must make an impression.
A good impression.
A lasting impression.
An impression they can’t forget for the right reasons.
A professional, eye-catching cover can mean the difference between a reader clicking "Buy" or passing over your book.
Even if your story is brilliant, a poorly designed cover can hurt sales. Here's how to create a cover that captures attention and aligns with your book’s content.
2.1 Understand the Importance of a Great Cover
Readers often judge a book by its cover, especially in the highly competitive self-publishing market. Your cover should:
The cover should reflect the genre of your book (e.g., romance covers often feature warm colours and intimate imagery, while thrillers might use darker tones and bold fonts).
Communicate the book's tone and themes visually.
Be visually clear, even as a thumbnail, since most readers will see it on Amazon in a small size.
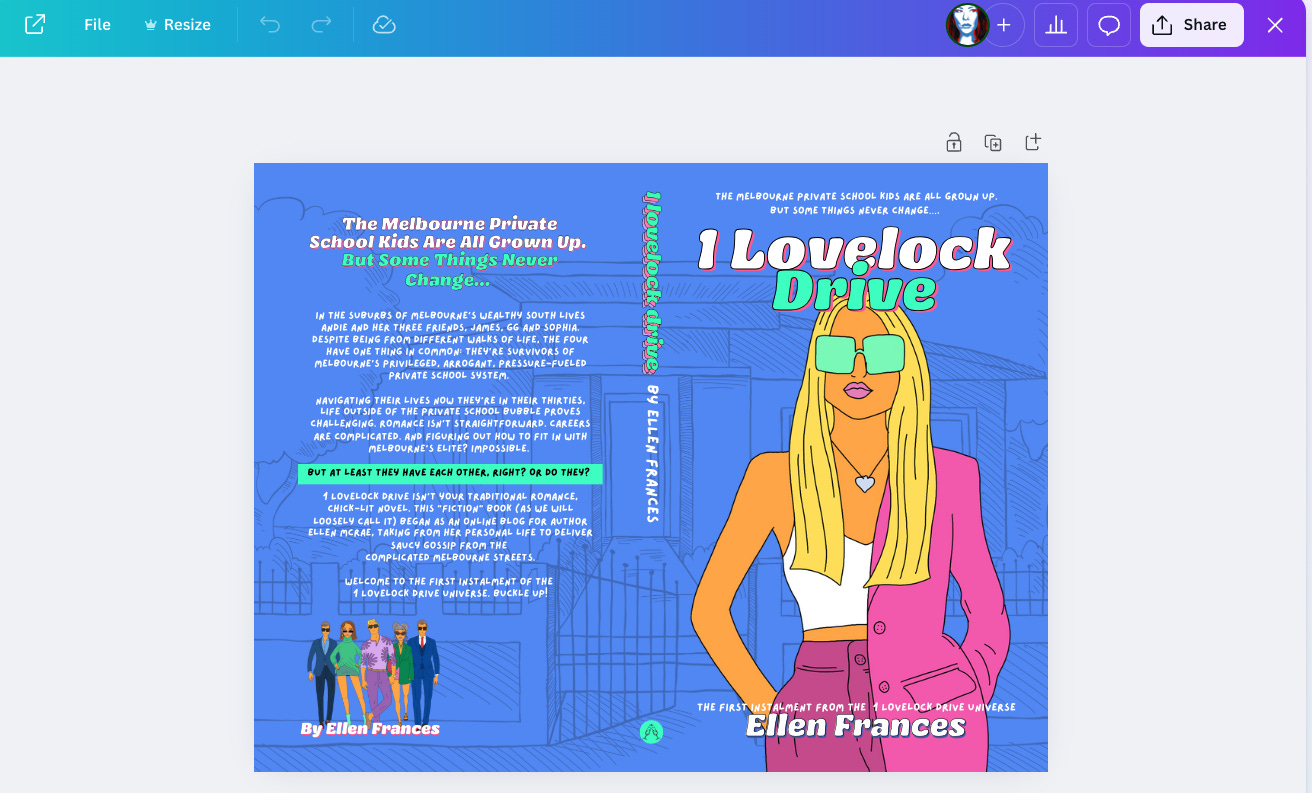
Below is the cover of my eBook for reference. Remember, my book sits in the romance fiction/women’s fiction genre.

2.2 Hire a Professional Designer
While there are free tools for creating covers, investing in a professional designer can be worth every penny. Here’s how to find one:
Where to Look
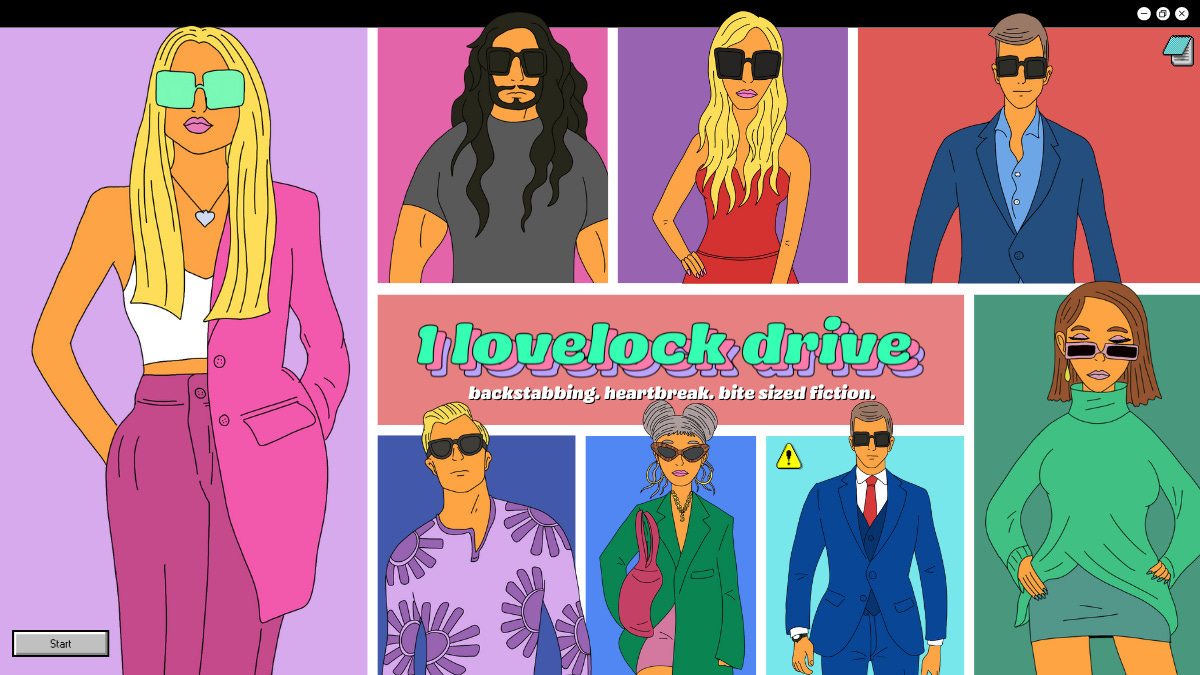
Freelance Platforms: Reedsy, Fiverr, and Upwork are great places to find experienced cover designers. Fiverr is where I found my graphic designer who created the imagery for my characters, as shown below.
Specialized Designers: Some designers specialize in book covers for specific genres. Search for portfolios that align with your vision.
What to Provide to Your Designer
Book Details: Title, subtitle, author name, and any tagline.
Genre and Tone: Let the designer know your book’s genre and the mood you want to convey.
Inspiration: Share examples of book covers you admire or ones from bestselling books in your genre.
Specifications: Provide Amazon KDP’s dimensions and formatting requirements (see Section 2.4 below).
Budget Tips
If you’re on a tight budget, consider pre-made book covers. Many designers sell customizable templates that look professional and cost less than custom designs.

2.3 DIY Cover Design (which is what I did)
If hiring a professional isn’t an option, you can design your cover yourself using free or affordable tools.
Design Tools
Canva: This program offers beginner-friendly options with templates specifically for book covers. This is where I created my design, and I would be happy to chat all things Canva in a separate article. Comment to let me know your interest! Below are screenshots of my Canva screen, showing the template I downloaded from Amazon and how the cover turned out. I didn’t even need Canva’s options in the end, but it was easily to apply my design on this program,

Book Brush: A tool tailored for self-publishing authors with drag-and-drop options.
Adobe Photoshop or Illustrator: More advanced tools for those with graphic design skills.
Best Practices for DIY Covers
Simplicity is Key: Avoid cluttered designs. A simple layout with clear text and a single striking image often works best.
Readable Fonts: Use large, easy-to-read fonts that stand out against the background.
Colours that Pop: Choose colours that contrast well and align with your genre (e.g., dark and moody for thrillers, light and cheerful for romance). Again, you need to do some research on this. Go to bookstores and look at the covers. Take note of what works and what looks odd against the competition.
High-Quality Images: Use royalty-free images or stock photos from sites like Unsplash, Pexels, or Shutterstock.
Pro Tip: Test your design by shrinking it to thumbnail size. If the title and imagery remain clear, you’re on the right track.


2.4 Amazon KDP Cover Specifications
Whether you’re working with a designer or creating the cover yourself, it’s crucial to meet Amazon’s technical requirements for both eBook and paperback covers.
Kindle eBook Cover
File Format: JPEG or TIFF.
Dimensions: Recommended size is 2560 x 1600 pixels with a 1.6:1 aspect ratio.
Resolution: At least 300 DPI (dots per inch) for clear imagery.
Paperback Cover
File Format: PDF (includes the front cover, spine, and back cover as one file).
Trim Size: Amazon offers standard sizes (e.g., 6” x 9”), and you’ll need to format your cover to match your chosen trim size.
Bleed: Allow for a bleed margin (extra space at the edges) to ensure no white space appears when the cover is printed.
Spine Width: This depends on your book's page count. Amazon KDP’s Cover Calculator can help you determine the exact dimensions.
2.5 Add Back Cover Elements (Paperback Only)
If you’re publishing a paperback, the back cover is just as important as the front. Here’s what to include:
Book Description
A brief and compelling summary of your book to hook readers.
Author Bio
A short paragraph about you, including any previous works, fun facts, or your background as an author.
Barcode and ISBN
Amazon KDP automatically generates and places the barcode on the back cover if you use their free ISBN. If you purchase your own ISBN, you’ll need to include the barcode in your design.
I’m happy to dive deep into book descriptions and author bios, outlining how best to nail this part of the process. Let me know by subscribing and leaving a comment!
2.6 Test and Review Your Cover
Before finalizing your cover, test it with your target audience. Share it with beta readers, fellow writers, or online writing communities to gather feedback. Questions to ask:
Does it grab your attention?
Does it align with the genre?
Is the title readable at a glance?
Once you’ve polished the design based on feedback, you’re ready to move forward.
Checklist for Step 2: Designing Your Cover
Hired a professional designer or used a DIY tool.
Followed Amazon KDP’s cover specifications.
Created a compelling back cover for the paperback (if applicable).
Tested and refined the design based on feedback.
Step 3: Set Up an Amazon KDP Account
Once your manuscript and cover are finalized, it’s time to set up your Amazon Kindle Direct Publishing (KDP) account. KDP is the platform you’ll use to publish, price, and distribute your book to readers worldwide.
Setting up your account is straightforward, but there are a few key details to get right along the way.
3.1 Create a KDP Account
Sign Up
Visit Amazon KDP and sign in with your existing Amazon account, or create a new account specifically for your publishing activities.
Complete Your Profile
Once logged in, navigate to your account settings and fill in the required information:
Name or Business Name: Use the name you want to be associated with your publishing.
Email Address: Ensure this is an active email you regularly check.
Payment and Tax Information
To receive royalties, you’ll need to set up payment and tax details. Here’s what to prepare:
Bank Account Information: Add the account where Amazon will send your royalties. Amazon offers payments in many currencies, so you can choose your preferred one.
Tax Information: Complete the tax interview to determine your tax status. If you’re outside the U.S., you may need to provide your tax identification number to reduce withholding taxes under a tax treaty.
Verify Your Account
Amazon may send a verification email or request additional documents to confirm your identity. To avoid delays, ensure you complete this step. I waited on this and it caused me a headache later!
3.2 Explore the KDP Dashboard
Once your account is set up, familiarize yourself with the KDP dashboard. This is your hub for managing books, tracking royalties, and accessing resources.
I go to the dashboard daily, so understanding what it means, how you use it, and how to get the most out of it speeds up the process.
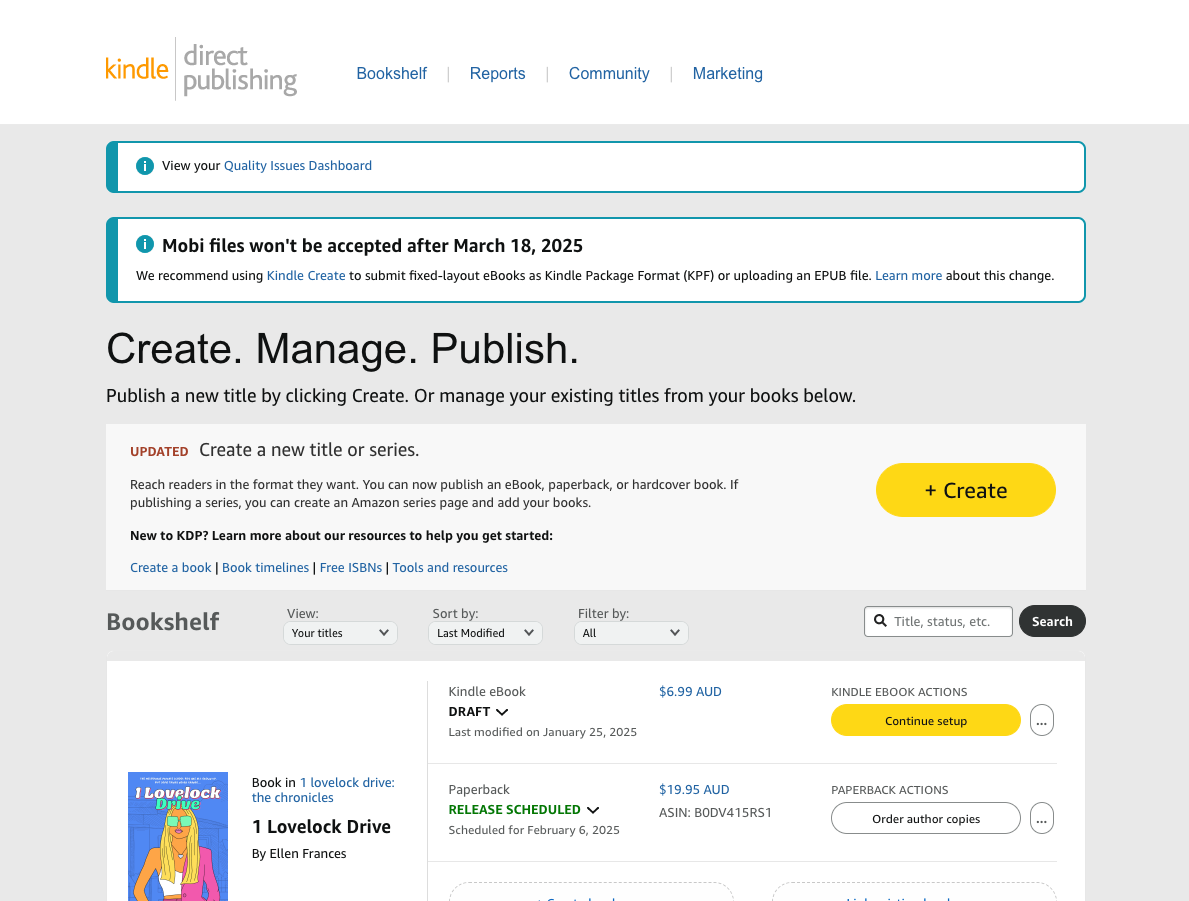
Bookshelf
This is where you’ll add new books and manage existing ones. Each book entry is divided into Kindle eBook and Paperback formats.
Reports
The Reports section tracks your sales, page reads (for Kindle Unlimited), and royalties.
Community and Resources
Check out Amazon’s free guides and forums for self-published authors. You’ll find resources on formatting, marketing, and optimizing your book’s performance.
3.3 Choose Your Book’s Format
When you’re ready to start publishing, you’ll choose between two formats (or both):
Kindle eBook
Digital format that’s available on Kindle devices and apps.
Ideal for most genres, including fiction, memoirs, and non-illustrated books.
Paperback
Print-on-demand paperback books that Amazon prints and ships to customers.
It is great for genres like nonfiction, children’s books, and graphic novels, as well as for authors who want a physical version of their work.
Many authors choose to offer both formats to reach a wider audience. That’s what I did!
3.4 Review Amazon’s Publishing Guidelines
Before proceeding, it’s a good idea to familiarize yourself with Amazon’s content and publishing guidelines to avoid potential issues.
Content Guidelines
Amazon does not allow plagiarised or public-domain content without value-added commentary.
Ensure your content complies with local laws and does not include offensive material.
Book Cover and Formatting Requirements
Double-check that your manuscript and cover meet Amazon’s technical specifications (refer to Steps 1 and 2).
Pricing and Royalties
Start thinking about how you’ll price your book. Amazon offers royalty options of 35% or 70%, which we’ll cover in detail in Step 6.
3.5 Set Up Your Author Central Profile
Amazon Author Central is a free tool for creating an author profile, managing your book’s metadata, and tracking your sales.
Sign Up
Go to Amazon Author Central and log in with your KDP account.
Create Your Profile
Add a professional author bio, profile picture, and links to your social media or website.
Your author page will appear on your book’s Amazon page, so make it engaging and informative.
Link Your Books
Once your book is live, you can claim it in Author Central so it appears on your author profile.
Checklist for Step 3: Setting Up Your KDP Account
Created an Amazon KDP account and completed profile details.
Provided bank account and tax information for royalty payments.
Familiarise yourself with the KDP dashboard and tools.
Decided on publishing formats (Kindle eBook, Paperback, or both).
Reviewed Amazon’s content and publishing guidelines.
Set up an Amazon Author Central profile.
Step 4: Upload Your Book to Amazon KDP
With your manuscript polished, cover designed, and Amazon KDP account set up, it’s time to bring everything together. In this step, you’ll upload your book files, input essential details, and ensure your book is ready for publishing.
Let’s break it down.
4.1 Start a New Book Project
Log Into Your KDP Dashboard
Navigate to the KDP dashboard and click on the “Create” button. Choose whether you’re publishing a Kindle eBook, Paperback, or both.
Choose a Language
Select the primary language of your book (e.g., English, Spanish, etc.).
4.2 Enter Your Book Details
The first section you’ll fill out is your book’s metadata—this is critical for helping readers discover your book on Amazon.
Book Title and Subtitle
Enter your book’s title exactly as you want it to appear.
Add a subtitle (if applicable) to clarify your book’s theme or target audience (e.g., "1 Lovelock Drive: A Riveting Psychological Thriller").
Series Information (Optional)
If your book is part of a series, enter the series name and volume number.
Edition Number
This is typically for updated versions of the same book. If it’s your first publication, leave this blank or set it to “1.”
Author Name
Add the name you want displayed on the book cover and Amazon listing.
Contributors
If others contributed to your book (e.g., editors, illustrators, or co-authors), list their names here.
Book Description
Write a compelling description that hooks readers and gives them a reason to buy your book. Use bold and italic formatting sparingly to emphasize key points.
Publishing Rights
Select “I own the copyright” if your book is original content. If your book includes public domain content, select the appropriate option.
Keywords
Add up to 7 keywords or phrases to help readers find your book. Choose terms specific to your book’s genre and themes. For example, a thriller might include keywords like “domestic suspense,” “psychological mystery,” or “suburban secrets.”
Categories
Choose up to 2 categories that best fit your book’s genre. These determine where your book will appear on Amazon. Use Amazon’s “Category Finder Tool” or browse similar books to see which categories they’re listed in.
Example categories for a thriller: Fiction > Thrillers > Domestic or Fiction > Mystery & Detective > Psychological.
Age Range and Audience (Optional)
Specify the appropriate age range - if your book is for children, teens, or young adults, etc.
Pre-Order Option
If you want to build hype before your book’s release, select the Pre-Order option and set a release date. Otherwise, choose Publish Without Pre-Order to make the book available immediately after approval.
4.3 Upload Your Manuscript
Upload the File
For Kindle eBooks, upload your manuscript in DOCX, EPUB, or KPF format. Amazon will automatically convert it to Kindle format.
For paperbacks, upload your manuscript in PDF format to ensure consistent formatting.
Preview Your Book
Use the Kindle Previewer or Amazon’s online preview tool to review how your book will appear on different devices. Pay close attention to:
Chapter breaks and indents.
Font consistency and readability.
Any images or special formatting.
Fix Any Issues
If something looks off, revise your manuscript and re-upload the file until it meets your standards.
4.4 Upload Your Cover
Upload Your Cover File
For Kindle eBooks, upload your cover in JPEG or TIFF format.
For paperbacks, upload the full cover (front, spine, and back) as a single PDF file.
Use the Cover Creator (Optional)
If you don’t have a custom cover, Amazon’s Cover Creator Tool allows you to design one using templates. While not ideal for professional results, it’s a good option for those on a budget.
Preview the Cover
Ensure the cover looks polished and aligns with your genre. Check that the spine text is legible (for paperbacks) and the front cover pops at thumbnail size.
4.5 Choose Print Options (Paperback Only)
If you’re publishing a paperback, Amazon will ask for details about the physical copy:
Trim Size
Choose the dimensions of your book. Popular options include 6” x 9” or 5.5” x 8.5”.
Interior Type
Select Black & White or Color, depending on your manuscript. Most novels are black and white, while children’s books or cookbooks may require colour printing.
Paper Type
Options include Cream (recommended for fiction) or White (for nonfiction or illustrated books).
Bleed Settings
Choose Bleed if your book includes images or design elements that extend to the page edge.
Finish
Choose between a Matte or Glossy cover. Matte covers are common for fiction, while glossy covers work well for photography or children’s books. I opted for a glossy cover for mine because I didn’t love the fingerprints on the matte design.
4.6 Save and Continue
Once you’ve uploaded your manuscript and cover and selected your book’s details, click Save and Continue to proceed to the Pricing and Royalties step (covered in Step 5).
Checklist for Step 4: Uploading Your Book
Created a new project on KDP and selected Kindle eBook, Paperback, or both.
Entered all book details (title, description, keywords, categories, etc.).
Uploaded and reviewed the manuscript for errors.
Uploaded the cover and ensured it meets Amazon’s specifications.
Selected print options (for paperbacks).
Saved the project and reviewed it for accuracy.
Step 5: Set Your Book’s Price and Royalties
Now that your manuscript and cover have been uploaded, it’s time to determine how much readers will pay for your book and how much you’ll earn from each sale.
Pricing your book effectively is critical—too high, and readers may overlook it; too low, and you might not make a profit. It’s a balancing act!
In this step, I’ll walk through Amazon’s royalty options, pricing strategies, and how to distribute your book globally.
5.1 Choose a Royalty Plan
Amazon offers two royalty options for Kindle eBooks: 35% and 70%. Here’s what you need to know about each:
35% Royalty Option
Available for all eBooks priced between $0.99 and $200.
You’ll earn 35% of the list price (minus delivery costs, if applicable).
Recommended for: Niche books, short works, or books with a smaller audience.
70% Royalty Option
Available for eBooks priced between $2.99 and $9.99.
You’ll earn 70% of the list price (minus delivery costs, which are typically minimal).
Eligibility Requirements:
The eBook must be available in specific territories, such as the US, UK, Canada, and Australia.
The price must be at least 20% lower than the paperback price (if applicable).
Recommended for: Most genres, especially fiction, nonfiction, and novels targeting a wide audience.
For paperbacks, Amazon offers a fixed 60% royalty rate, minus printing costs. Printing costs depend on the book’s page count, size, and whether it’s black-and-white or color.
5.2 Set Your Book’s List Price
Understand Pricing Psychology
Readers tend to associate certain price ranges with specific types of books:
$0.99–$2.99: Typically for short works, introductory books, or promotional offers.
$3.99–$7.99: The sweet spot for most self-published eBooks, especially in fiction.
$8.99+: Often reserved for well-known authors or comprehensive nonfiction works.
Research Your Genre
Browse the Kindle Store to see how books in your genre are priced. This helps you stay competitive.
Example: If most thrillers are priced at $4.99, pricing yours at $6.99 may deter readers, while $3.99 could make it more appealing.
Price for Profit
Use Amazon’s royalty calculator to estimate your earnings per sale.
For paperbacks, consider printing costs when setting the price. For example:
A 300-page paperback with a list price of $14.99 will have about $5.00 in printing costs. You’ll earn 60% of the remaining $9.99, or approximately $6 per sale.
5.3 Enable Global Distribution
Amazon KDP allows you to sell your book worldwide. When setting your price, you can choose to:
Apply the Same Price Globally
Amazon will automatically convert your list price into the local currency of each marketplace (e.g., GBP for the UK, CAD for Canada).
Customize Prices by Region
You can set specific prices for different marketplaces. For example, you might price your book at $4.99 in the US but £3.99 in the UK to align with regional buying habits.
5.4 Enroll in Kindle Select (Optional)
Amazon offers an optional program called Kindle Select, which can boost your book’s visibility in exchange for exclusivity.
Benefits of Kindle Select
Your book becomes part of Kindle Unlimited (KU) and Kindle Owners’ Lending Library, allowing subscribers to read your book for free while you earn royalties based on pages read.
Access to promotional tools like Free Book Promotions (offering your book for free for up to 5 days) or Kindle Countdown Deals (limited-time discounts).
Requirements
Your eBook must be exclusive to Amazon for 90 days (you can still sell the paperback elsewhere).
Is Kindle Select Right for You?
If Amazon will be your primary sales platform, Kindle Select can help you gain more exposure, especially if you’re a new author.
If you plan to sell your book on other platforms (like Apple Books, Kobo, or Google Play), you may want to skip this option.
5.5 Preview and Save
Review Your Pricing
Double-check your list price and royalty rate for each marketplace. Ensure the pricing aligns with your goals and audience expectations.
Check Printing Costs (Paperback)
Amazon will display the estimated printing costs based on your book’s specifications. Adjust the price if needed to ensure you’re earning a profit.
Save Your Settings
Once everything looks good, save your pricing and proceed to the next step.
Checklist for Step 5: Setting Your Price and Royalties
Selected the royalty option (35% or 70%) for your eBook.
Set a competitive list price based on research and printing costs (if applicable).
Enabled global distribution or customized prices for specific regions.
Decided whether to enroll in Kindle Select.
Reviewed and saved your pricing details.
Loving this advice? Subscribe now for more!
Step 6: Review, Publish, and Promote Your Book
You’ve done the hard work: your manuscript is polished, your cover is stunning, and your book is uploaded to Amazon KDP with a pricing set.
Now it’s time to review your book one last time, hit “Publish,” and start promoting it to the world.
In this final step, I’ll discuss the publishing process, what to expect after launch, and strategies for spreading the word about your book.
6.1 Review Your Book Before Publishing
Before hitting the “Publish” button, it’s crucial to carefully review every aspect of your book to ensure it meets your standards and Amazon’s guidelines.
Proofread Your Amazon Book Page
Double-check the title, subtitle, author name, and description for typos or errors. These are the first things readers see, so accuracy is essential.
Preview Your Book (Again)
Use Amazon’s Previewer Tool to check both the Kindle and paperback versions of your book. Focus on:
Chapter formatting and text alignment.
Proper display of images, if applicable.
Legibility on different devices or sizes (e.g., Kindle, tablets, smartphones).
Ensure Compliance with Amazon Guidelines
Review Amazon’s content guidelines one more time to avoid potential delays or rejections.
Verify Printing Costs (Paperback Only)
Confirm that your paperback price covers printing costs and leaves room for profit.
6.2 Hit the “Publish” Button
When you’re satisfied with everything, it’s time to publish!
Click Publish
After completing all the steps in KDP, click “Publish Your Kindle eBook” or “Publish Your Paperback”.
Wait for Amazon’s Review
Amazon reviews all submitted books to ensure they meet formatting and content guidelines. This process typically takes 24–72 hours. If there are any issues, Amazon will notify you via email with instructions to fix them.
Your Book is Live!
Once approved, your book will be available for purchase on Amazon. You’ll receive an email confirming its publication, along with a link to your book’s Amazon page.
6.3 Promote Your Book
Publishing is just the beginning. To attract readers and generate sales, you’ll need a promotion plan. Here are some proven strategies to get your book noticed:
Leverage Your Network
Announce your book on social media, your email newsletter, or any platforms where you have a following.
Share personal anecdotes about your writing journey to connect with readers.
Set Up an Amazon Author Page
If you haven’t already, finalize your Amazon Author Central profile. Link your book, add a bio, and upload a professional author photo.

Encourage Reviews
Positive reviews are key to building credibility and driving sales. Ask friends, family, and early readers to leave honest reviews on Amazon.
Use Social Media Marketing
Create engaging posts about your book’s themes, characters, or inspiration.
Consider running ads on platforms like Facebook, Instagram, or TikTok to reach your target audience.
Run a Promotion
If you enrolled in Kindle Select, use the Free Book Promotion or Kindle Countdown Deals to attract readers. These promotions can increase downloads and help your book rank higher on Amazon.
Reach Out to Bloggers and Influencers
Find bloggers, podcasters, or social media influencers who align with your book’s genre. Offer them a free copy in exchange for a review or feature.
Participate in Online Communities
Engage with readers in forums, book clubs, and groups on platforms like Goodreads or Reddit. Avoid spamming and focus on building genuine connections.
Use Paid Advertising (Optional)
Explore Amazon Ads to boost your book’s visibility in search results and target specific keywords or categories.
6.4 Monitor Performance
Once your book is live, track its performance to understand what’s working and where you can improve.
Sales Reports
Use the Reports section in your KDP dashboard to monitor daily sales, royalties, and Kindle Unlimited page reads.
Reader Feedback
Read customer reviews and take note of common themes. Positive feedback can help refine your marketing, while constructive criticism can guide future projects.
Experiment with Pricing
If sales slow down, consider adjusting your price. For example, a temporary price drop can boost downloads and reviews.
6.5 Plan for the Long Term
Publishing your book is a milestone, but it’s also the start of a long-term journey. Keep these tips in mind:
Write Your Next Book
One of the best ways to build your readership is to publish more books. A series or multiple titles in the same genre can attract loyal fans.
Stay Engaged with Readers
Keep connecting with your audience through newsletters, social media, and updates about future projects.
Refine Your Marketing
Analyze what worked during your first book launch and apply those lessons to future releases.
Consider Print and Audiobook Formats
Expanding into new formats, such as audiobooks, can help you reach a wider audience.
Checklist for Step 6: Review, Publish, and Promote
Reviewed your manuscript, cover, and Amazon book page one last time.
Hit “Publish” on your Kindle eBook and/or paperback.
Waited for Amazon’s approval and confirmed your book is live.
Launched your promotion strategy to spread the word about your book.
Monitored sales, reviews, and feedback to evaluate performance.
Step 7: Maintain Momentum and Build Your Author Brand
Publishing your book is a huge accomplishment, but the journey doesn’t end there! In the competitive world of self-publishing, it’s important to keep the momentum going and establish yourself as an author with a growing fanbase.
This step focuses on maintaining interest in your book, growing your audience, and building a lasting author brand.
You might not be worried about this just yet. All the work you need to do to get the book published might feel overwhelming, which I understand.
Yet, it’s good to know what will come so you can make better decisions now.
7.1 Engage with Your Readers
Your readers are your biggest supporters and the foundation of your success. Building a relationship with them will not only boost loyalty but also create word-of-mouth promotion for your book.
Respond to Feedback and Reviews
While you can’t reply directly to Amazon reviews, you can engage with readers on social media, forums, or email. A simple “thank you” can go a long way.
Create a Newsletter
Start an email list to inform your readers about your writing journey, upcoming books, and special promotions. Use platforms like Mailchimp or Substack to manage your emails.
Offer a freebie, such as a short story or sample chapters, as an incentive to subscribe. I did that with my Substack for my book. Below is the first chapter of my book, for example.

Host Events or Interactions
Plan virtual book signings, Q&A sessions, or live chats on platforms like Instagram Live, YouTube, or Facebook.
If your book is picked by a group, participate in book club discussions—this is a great way to connect directly with readers.
7.2 Continue Marketing Your Book
Even after the initial launch buzz dies down, consistent marketing is essential to keep your book visible to new audiences.
Run Seasonal Promotions
Use Amazon’s tools like Kindle Countdown Deals to offer discounts during holidays, back-to-school season, or other relevant occasions.
Promote these sales on your social media, website, and newsletter.
Leverage New Reviews and Milestones
Share notable reviews, awards, or milestones (e.g., “500 copies sold!”) to reignite interest in your book.
Update Your Book’s Metadata
Periodically revisit your book’s keywords, categories, and descriptions to ensure they’re optimized for current trends. For example, if a particular subgenre becomes popular, adjust your keywords to match.
Collaborate with Other Authors
Partner with authors in your genre to cross-promote each other’s books. Joint giveaways, blog features, or anthology projects can expose you to a wider audience.
7.3 Expand Into Additional Formats
Making your book available in other formats can significantly widen your reach and revenue potential. I’m yet to do this but many authors swear by it.
Create an Audiobook
Audiobooks are one of the fastest-growing formats in publishing. Use services like ACX (Amazon’s audiobook production platform) to hire a narrator or record the audiobook yourself.
Consider offering audiobooks on platforms like Audible, iTunes, and Google Play.
Explore Translations
If your book has international appeal, consider translating it into other languages. Amazon offers a service called KDP Select Global Fund, which can help distribute translated versions to foreign markets.
Experiment with Limited-Edition Prints
A hardcover version or a signed collector’s edition can be an exciting offering for your fans.
7.4 Plan Your Next Project
Nothing keeps readers engaged like a promise of more to come. Whether you’re writing a sequel, starting a new series, or venturing into a new genre, staying active as a writer helps grow your audience and solidify your brand.
Follow Reader Feedback
If readers love certain characters or themes, consider building on them in future projects.
Outline Your Next Book
Set writing goals and start drafting as soon as you can. Publishing consistently helps maintain momentum. I have multiple books scheduled for this year, which is incredibly exciting.
Announce Your New Book Early
Tease your next project on social media or in your newsletter to build anticipation. Share progress updates, cover reveals, or sneak peeks of chapters.
7.5 Build Your Author Brand
Your author brand is more than just your books—it’s your identity as a writer and how readers perceive you. A strong, consistent brand helps build trust and recognition.
Develop Your Online Presence
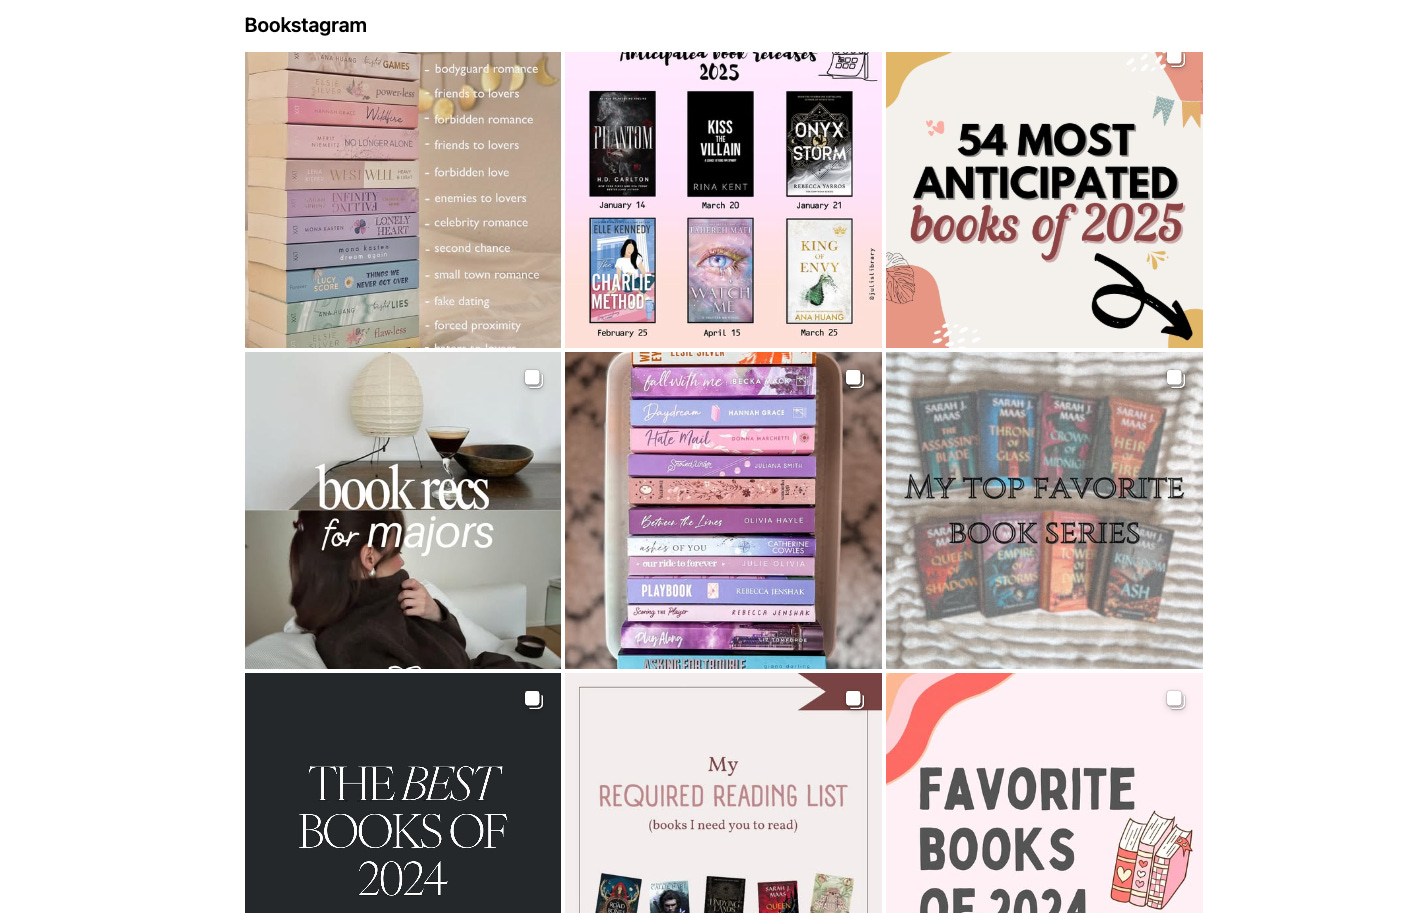
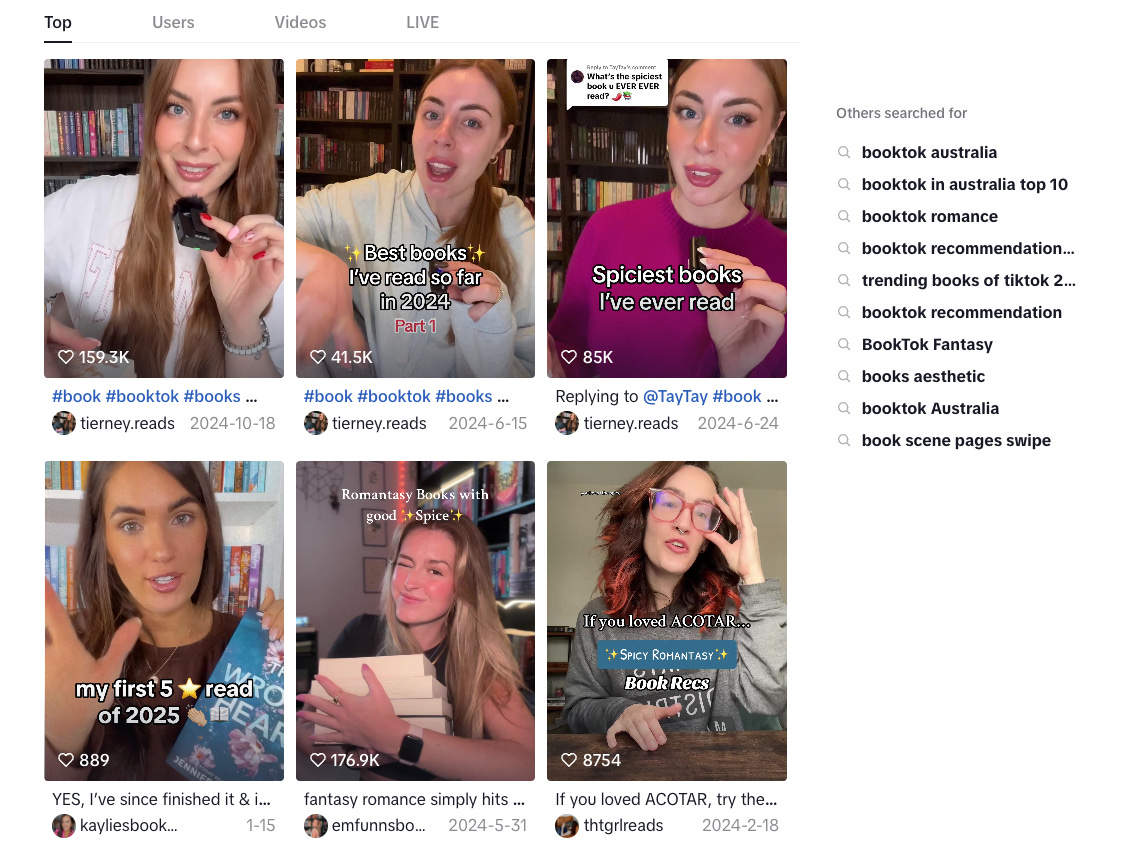
Maintain an active presence on platforms like Instagram, Pinterest, or TikTok, where readers often discover new authors.
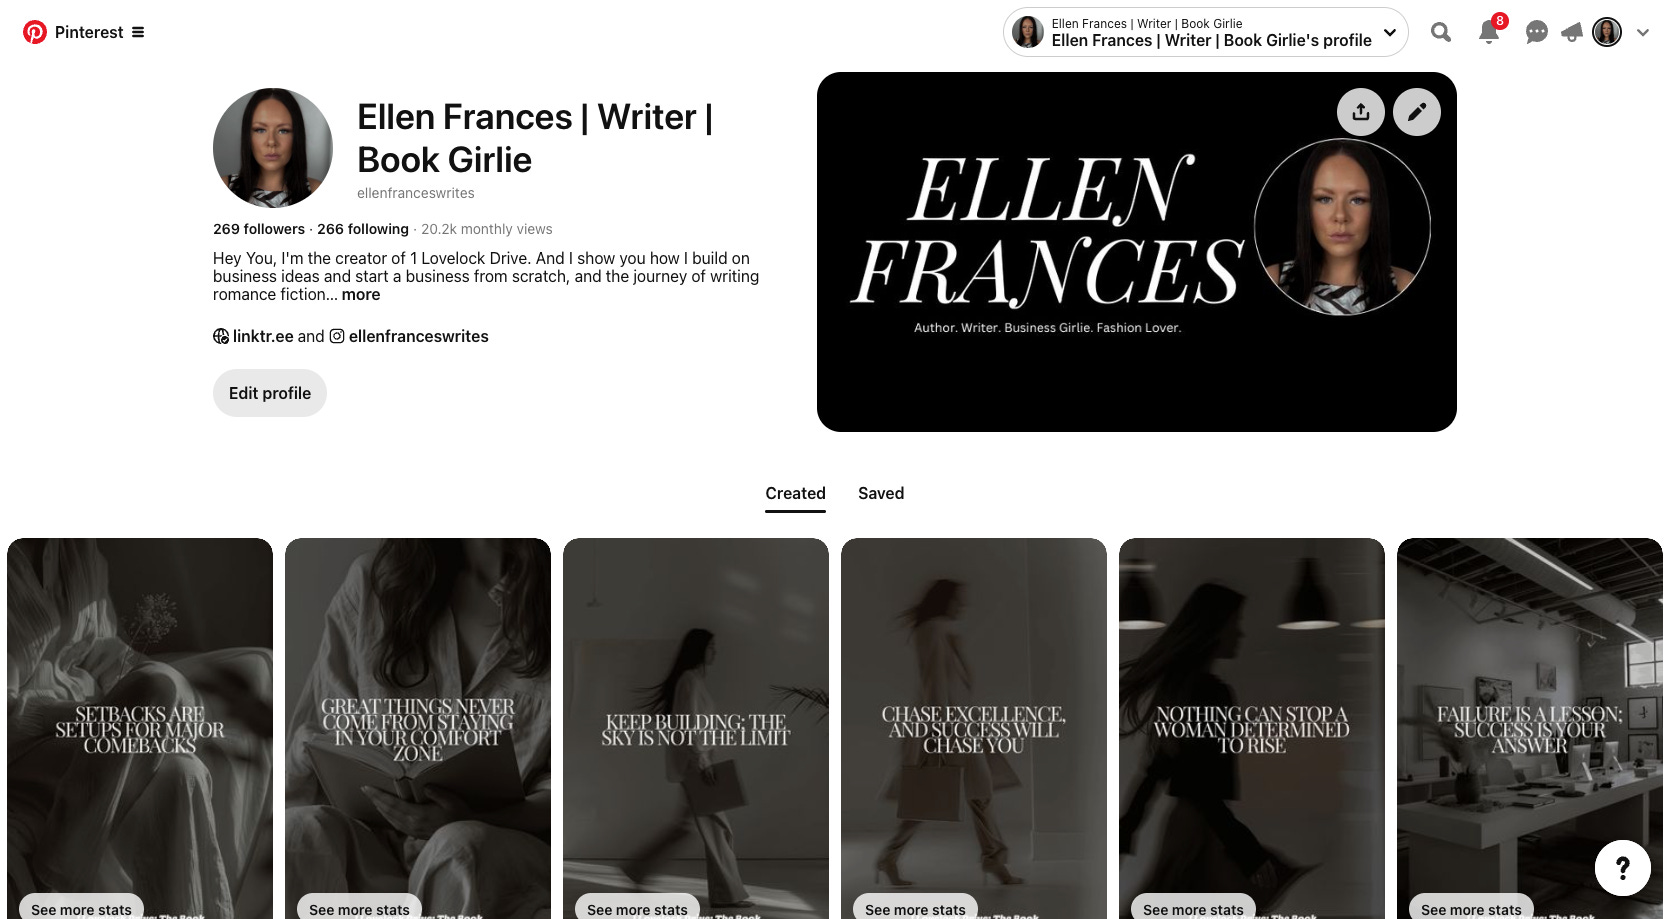
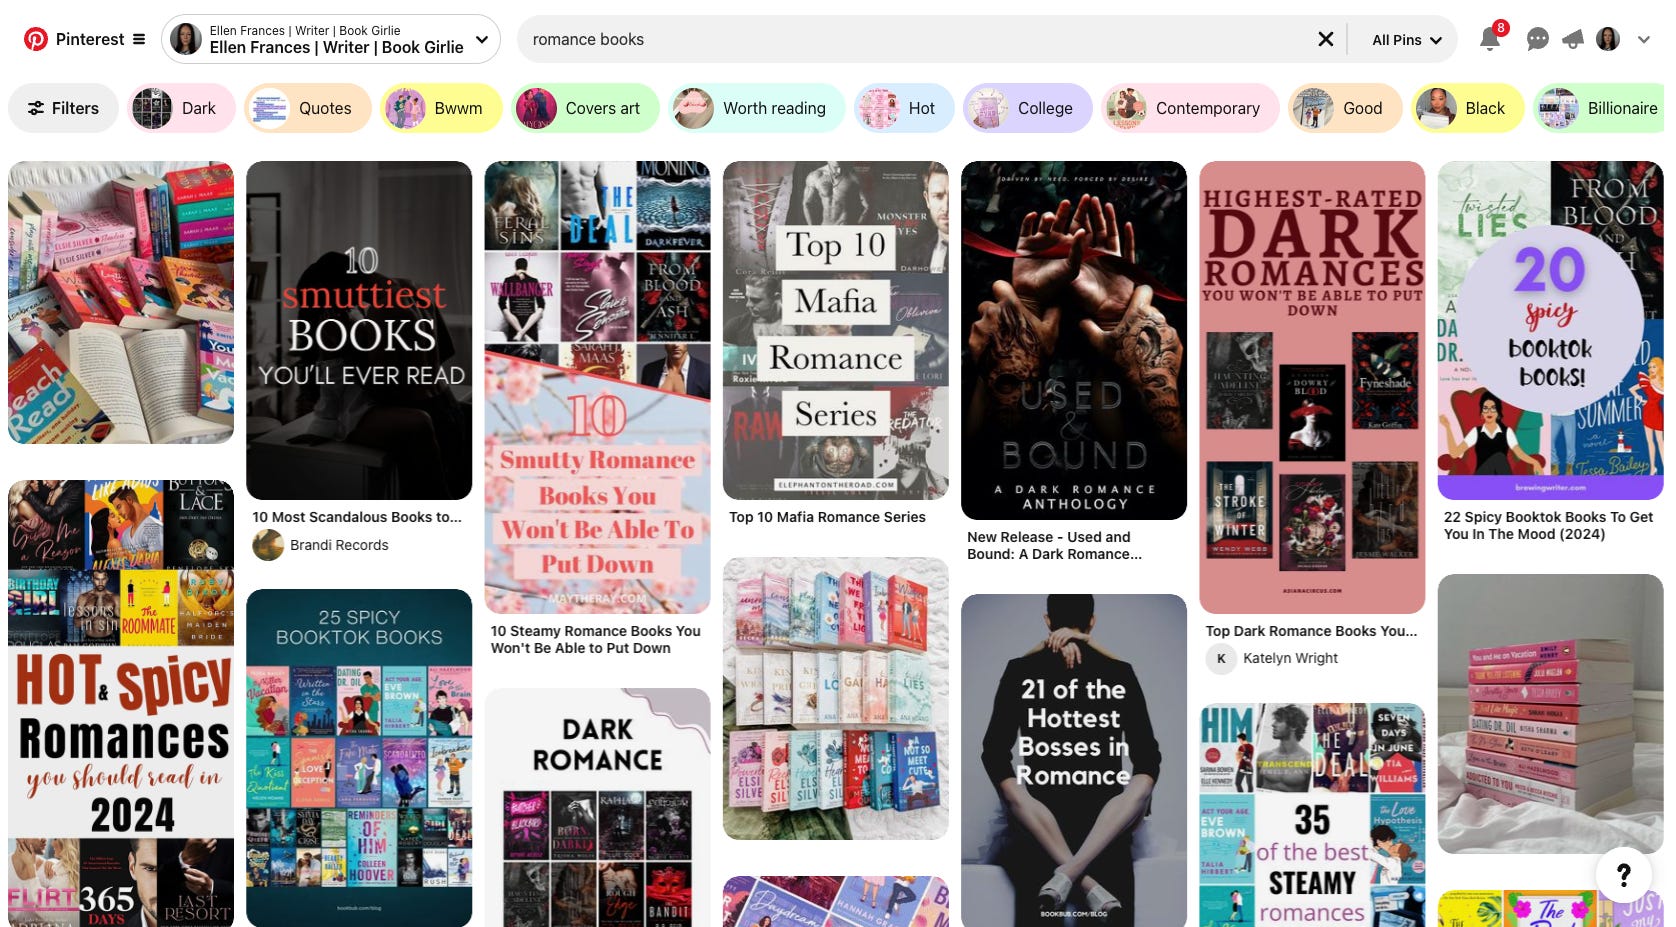
My Pinterest profile Use a professional author website as your central hub, including links to your books, bio, events, and newsletter signup.
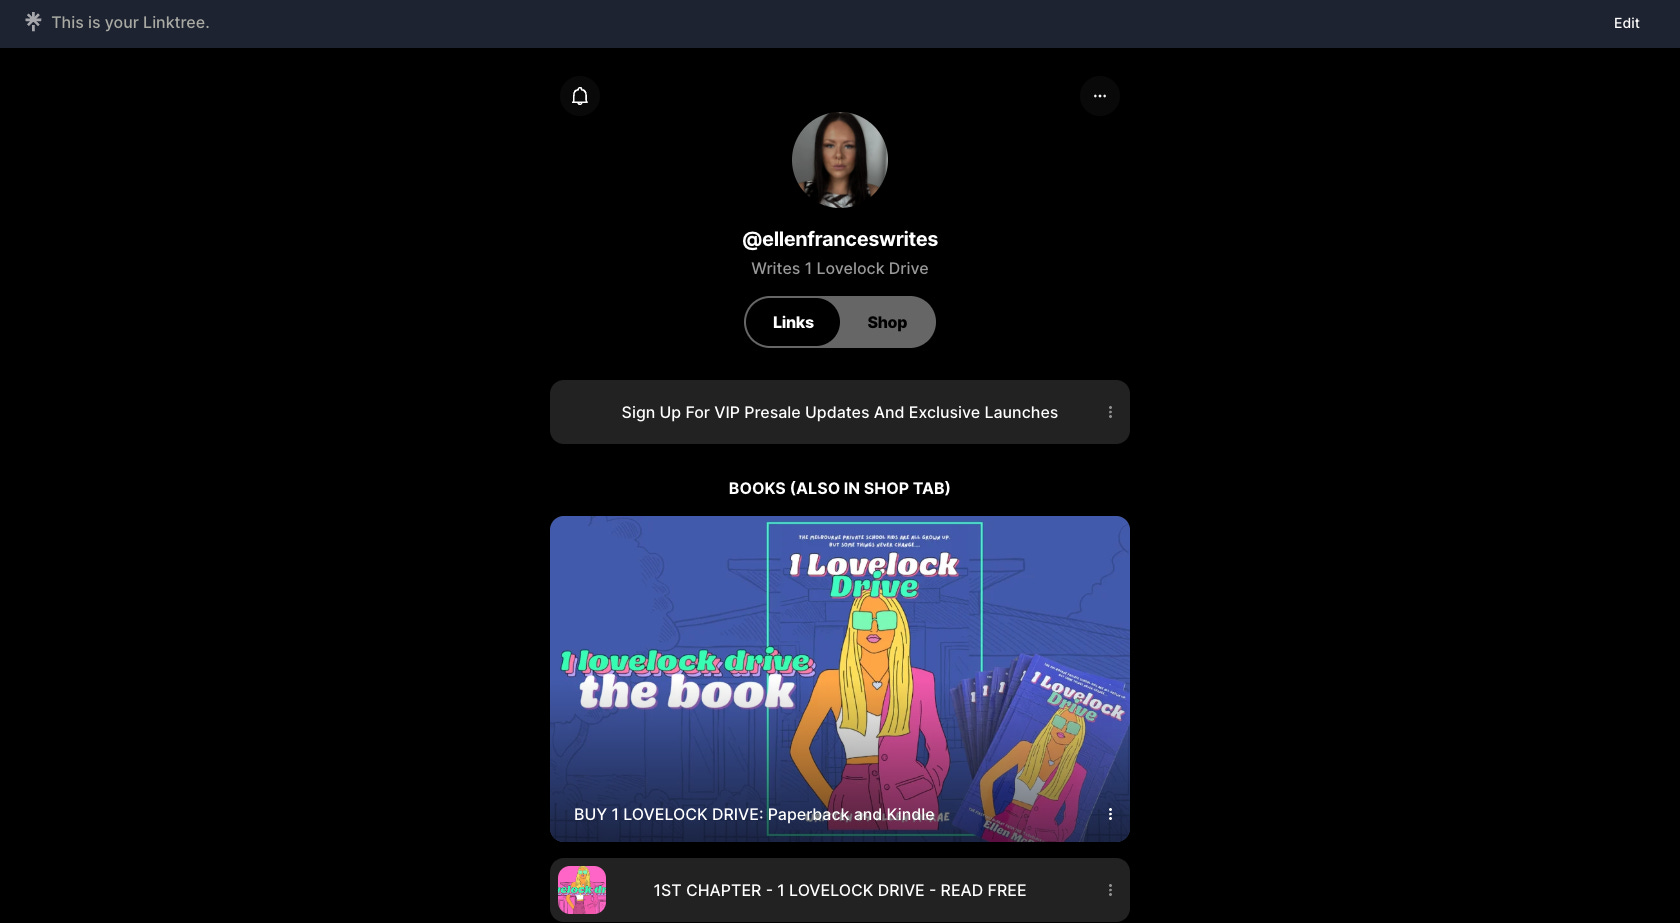
My Lintree - my placeholder website for now Create Consistent Visuals
Use similar fonts, colours, and imagery across your book covers, social media posts, and website. Consistency helps readers immediately associate your brand with your work.
Network in the Writing Community
Attend virtual or in-person writing conferences, join author groups, and engage with fellow writers. Building connections can lead to opportunities for collaborations, mentorship, and more exposure.
Be Authentic
Share your personal journey as a writer, including your challenges and victories. Readers love connecting with authors on a human level.


Checklist for Step 7: Maintain Momentum and Build Your Author Brand
Engaged with readers via social media, newsletters, and events.
Continued marketing through promotions, collaborations, and updated metadata.
Expanded into new formats like audiobooks, translations, or limited-edition prints.
Start planning or drafting your next book to keep your audience engaged.
Strengthened your author brand with a consistent online presence and visual identity.
Celebrate Your Success
By following these steps, you’ve not only published your book but also set yourself up for long-term success as a self-published author.
Remember, every book you write adds to your legacy, and every reader you gain is a step toward reaching your dreams.
Stay consistent, stay authentic, and keep creating. The world is waiting for your stories!
You’re a Published Author – Now What?
Becoming a self-published author is an incredible achievement. You’ve successfully navigated the writing, editing, designing, and publishing process—and now, you’re sharing your story with the world.
But remember, this is just the beginning.
Your journey as an author is ongoing, and with each book you publish, you’ll grow, learn, and refine your craft.
But the work doesn’t end with one book. Every new project, marketing strategy, and reader interaction will help you grow your author brand and expand your reach.
Keep pushing the boundaries of your creativity, stay open to learning, and connect with your readers.
They are the heart of your success. You owe your success to your readers.
Self-publishing allows you to take control of your writing career, and it’s a journey that’s uniquely yours.
Whether you’ve written a single novel or you’re planning a whole series, take pride in what you’ve accomplished and know that the next chapter is always waiting to be written.
Now, go out there and make your mark on the world as a self-published author. The possibilities are endless, and your readers await your next story.

Ready to dive deeper?
I self-published a book, and I'm not gatekeeping the experience. Let's dive deep into the publishing process: selling books, writing books, working as a writer, and making publishing decisions.
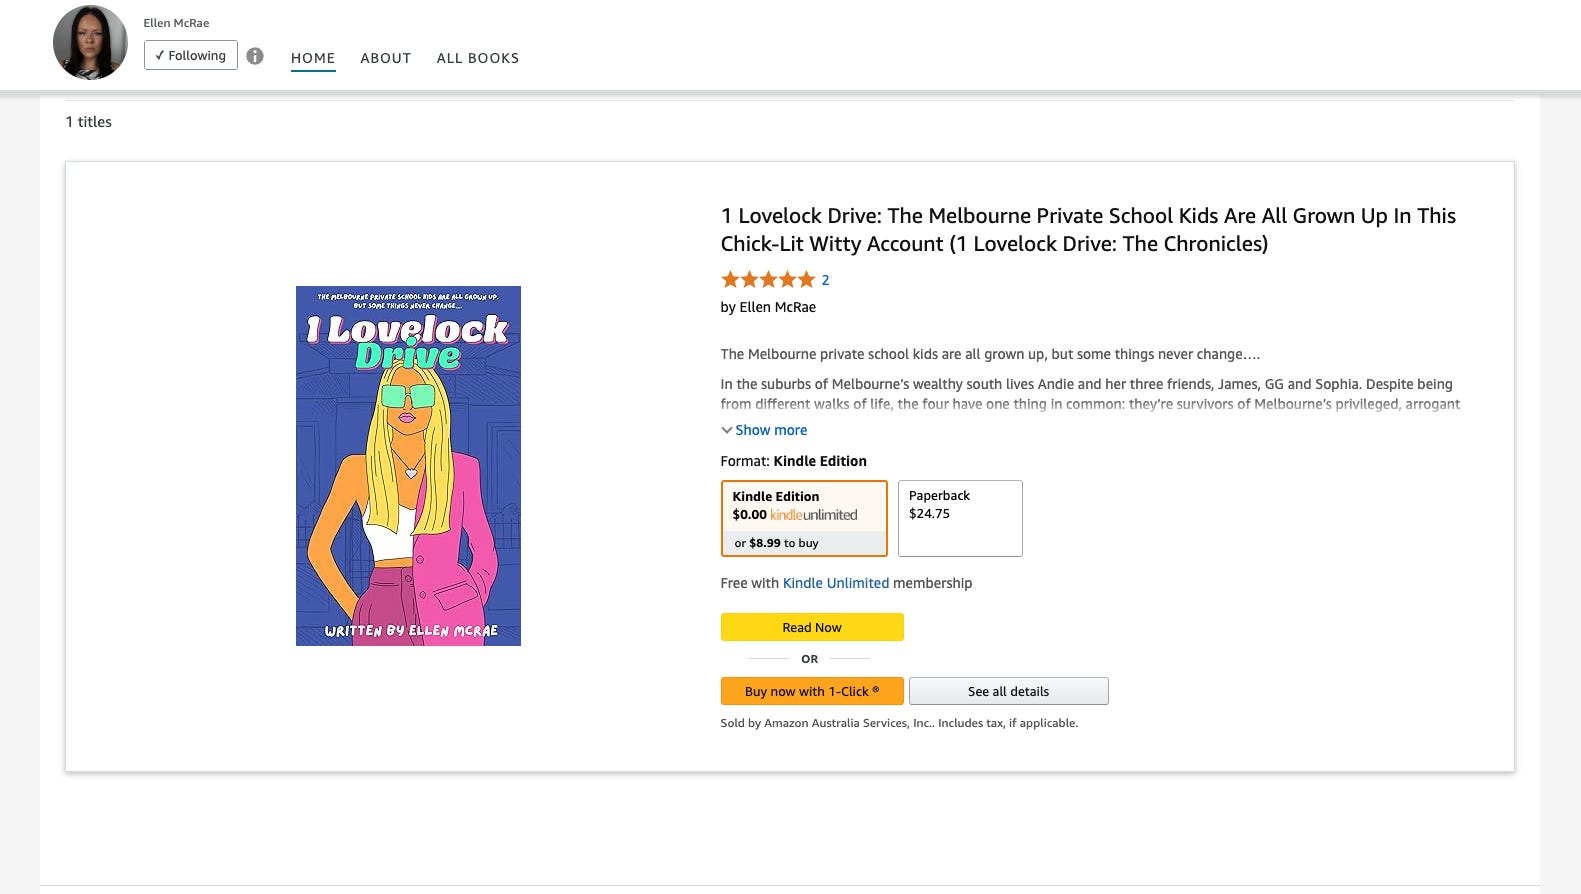
And heads up, here is my book, by the way. I talk about it a lot, so I want to introduce you to it formally. Friend, meet book, book, meet friend!